Step 1

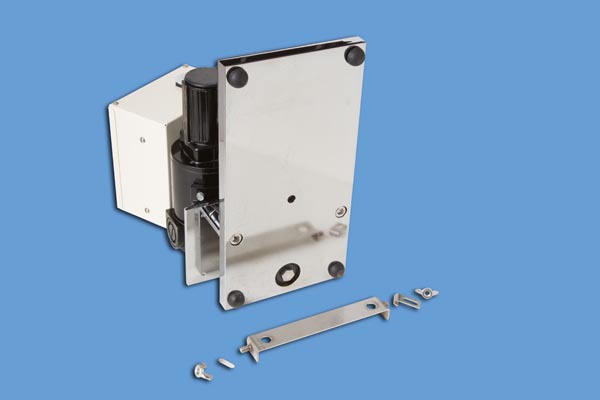
The hold down bracket and clips are not shipped pre-installed on the unit because the ends of the wing nuts would tear at the shipping container, possibly allowing for damage to the unit.
This item is easily installed and only requires installation one time. These directions are provided to assist with this installation.
Gently turn instrument on its side.
Step 2

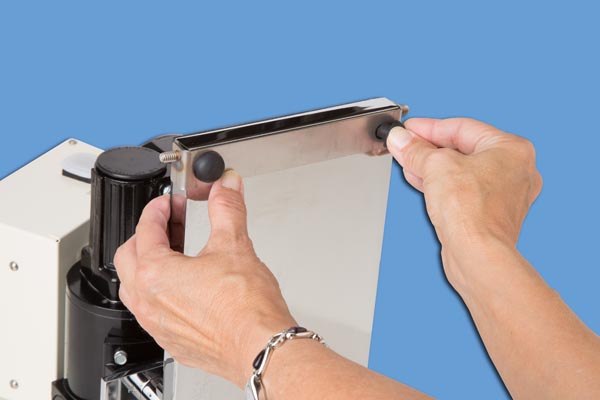
Remove the two rubber feet by gently twisting and pulling the feet. Remove the wing nuts and the hold down clips from the bracket with the two holes (this makes installation easier).
Hold the bracket in place so that the holes are lined up with the holes on the base and with the studs toward the end of the unit.
While holding the bracket in place, replace the feet into the holds (a gentle twist may be necessary to seat the feet).
Step 3

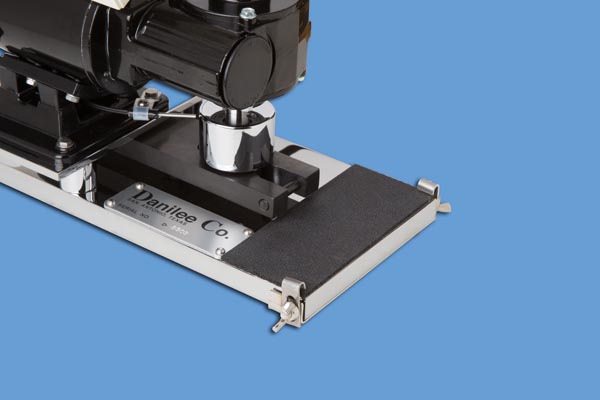
Gently tip the unit back to the operating position. Install the hold down clips with the wing nuts. The hold down bracket is designed so that it can move slightly, adjust the bracket so it is even with the end of the unit and is centered from side to side of the unit. The printed material can now hold pressure on the material to keep it from sliding.
CAUTION – Do not use excessive pressure to hold material in place as it could cause the material to not lay completely flat. Use only enough pressure to hold the material in place. placed on the pad and the hold down hooks adjusted
